Table Wizard
If you create even a simple table, which user can deal with, it requires a lot of routine work. You should add a number of Axapta objects in your application such as a table, a form, and a menu item. As well you should create your own Extended Data Types to use them for your table's fields. Don't forget to set particular values for the properties of your created objects, for example, the key field must have Mandatory property as True and AllowEdit as False . Besides you want your objects to follow the principle of the Axapta Best Practice.
Why should you use Table Wizard?
1. Table Wizard helps to reduce developers' routine work.
2. The Axapta application objects created by Table Wizard follow the principle of the Axapta Best Practice.
Setup Table Wizard
1. Download TableWizardForAX3.0 or TableWizardForAX2009 (20KB)
2. Open Axapta 3.0
3. Import project DevTableWizard.xpo
4. Recompile project DevTableWizard
5. Copy the label file (axWIZen-us.ald) to the application directory.
Table Wizard Demonstration
Let’s begin by creating a simple table like a customer group table. From the Axapta system menu, click:
Tools/Develepment tools /Wizards/ Table wizard
Here is the wizard’s welcome form:

The next step is filling the general information of the table. As you see in the illustration the postfix of the table name is 'Group'. It depends on the type of the table. The other properties are self-explanatory.

If we've chosen "add a key field", the next step is setting the property of the key field.

We also can choose between the creating a new EDT and the selecting an existing one. The form controls are activated or deactivated owing to our choice. The names of such objects as the EDT and field are formed as the Axapta best practice recommends.
If we've chosen "add a description field", the next step is setting the property of the description field.

The properties are the same as above. By default they are set with proper values. As we see, the field will extend the existing EDT, Description, and the field name consists of the table name 'Test' and the postfix 'Name'.
If we've chosen "create a form", we will see the next dialog.

Menu item's Help text and Security key name are necessary to follow the Axapta best practice.
Now we are ready to finish.

Now, let's look at the result of the work we've just done.
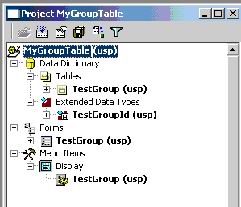
The project has been created and the application objects have been grouped.
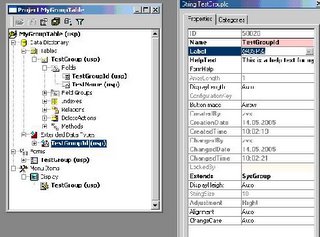
The following picture shows that the EDT's properties have been filled correctly and also the label records have been created in the label file.
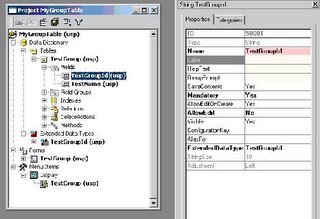
As we see in the next picture, the properties of the key field have been set properly. The base type of the field inherits from the created EDT.
The Relational Model for Database recommends setting the key field as mandatory. Additionally we won't be allowed to edit this field after a record of our table has been created.
The Axapta Best Practice recommends creating the following methods on any table with a unique key:
static find
The parameters to find areThe table's key, and an optional boolean used to indicate select for updateReturns a record indicated by the key.
static exist
The parameter to exist is the table's key.Returns a boolean that is true if a record with the supplied key exists.SELECT statements should be a direct SELECT statement, only fetching one field at a time.
These methods have been generated automatically.

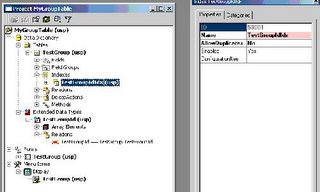
The next picture shows the created index and EDT's relation.
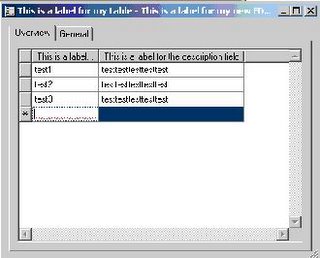
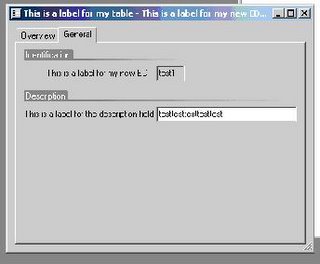
Here is the issued form of the table:
Summary
As you have seen, the creating of the table can hardly be considered difficult. Now you are able to make more creative things without any routine of doing many objects.
Why should you use Table Wizard?
1. Table Wizard helps to reduce developers' routine work.
2. The Axapta application objects created by Table Wizard follow the principle of the Axapta Best Practice.
Setup Table Wizard
1. Download TableWizardForAX3.0 or TableWizardForAX2009 (20KB)
2. Open Axapta 3.0
3. Import project DevTableWizard.xpo
4. Recompile project DevTableWizard
5. Copy the label file (axWIZen-us.ald) to the application directory.
Table Wizard Demonstration
Let’s begin by creating a simple table like a customer group table. From the Axapta system menu, click:
Tools/Develepment tools /Wizards/ Table wizard
Here is the wizard’s welcome form:

The next step is filling the general information of the table. As you see in the illustration the postfix of the table name is 'Group'. It depends on the type of the table. The other properties are self-explanatory.

If we've chosen "add a key field", the next step is setting the property of the key field.

We also can choose between the creating a new EDT and the selecting an existing one. The form controls are activated or deactivated owing to our choice. The names of such objects as the EDT and field are formed as the Axapta best practice recommends.
If we've chosen "add a description field", the next step is setting the property of the description field.

The properties are the same as above. By default they are set with proper values. As we see, the field will extend the existing EDT, Description, and the field name consists of the table name 'Test' and the postfix 'Name'.
If we've chosen "create a form", we will see the next dialog.

Menu item's Help text and Security key name are necessary to follow the Axapta best practice.
Now we are ready to finish.

Now, let's look at the result of the work we've just done.

The project has been created and the application objects have been grouped.
The following picture shows that the EDT's properties have been filled correctly and also the label records have been created in the label file.

As we see in the next picture, the properties of the key field have been set properly. The base type of the field inherits from the created EDT.
The Relational Model for Database recommends setting the key field as mandatory. Additionally we won't be allowed to edit this field after a record of our table has been created.

The Axapta Best Practice recommends creating the following methods on any table with a unique key:
static find
The parameters to find areThe table's key, and an optional boolean used to indicate select for updateReturns a record indicated by the key.
static exist
The parameter to exist is the table's key.Returns a boolean that is true if a record with the supplied key exists.SELECT statements should be a direct SELECT statement, only fetching one field at a time.
These methods have been generated automatically.

The next picture shows the created index and EDT's relation.

Here is the issued form of the table:


Summary
As you have seen, the creating of the table can hardly be considered difficult. Now you are able to make more creative things without any routine of doing many objects.